31 Jan 2025 • 5m read • 7m video
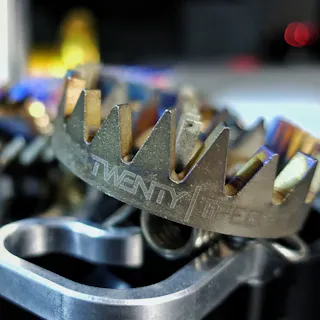
Upgrading to Twenty Titanium Foot Pegs: A How-To

Charlie Frost Author
Upgrading your dirt bike can be an exciting endeavor for any passionate rider. As you may have realized, stock bikes often leave something to be desired when it comes to performance, durability, comfort and aesthetics. That's why so many of us choose to swap out various components for aftermarket parts over time. Just like the footpegs!
Foot pegs serve an important purpose on dirt bikes - they provide a place for riders to plant their feet while riding. Proper foot support and grip allow you to better control the bike by shifting your body weight and anchoring yourself, especially when navigating rough terrain.
In this super short article i'll show you just how easy it is to install them.
Step-by-Step Installation Guide
The installation process for upgrading to aftermarket titanium foot pegs is straightforward, but does require some mechanical competency. You'll need basic tools like pliers, a hammer, and hex key or wrench for the brake lever. The kit should include the new foot pegs, springs, washers, and split pins.
Step 1: Use long nose pliers to remove the split pin from the bottom of the footpeg. They can be snapped as we'll use new ones anyway, but most likely you'll bend them to get hem out. Try to keep the old washer in sight.
Step 2: Now we're going to remove the foot peg. A warning here as it might pop out in to your face so keep your thumb covered over the spring. Because when we knock the pin out now the spring might fly off and catch you in the eye. Once you got that push the bottom of the pin and then wiggle it out.
Step 3: Put the new footrest in to place. Grab the old pin and slide it into the top to hold the footrest in place.
Step 4: Install the spring (just watch the video for detail on this) - but do this in one go as you don't want the spring to shoot out. Push the pin further in so the spring stays in place.
Step 5: Put the washer back in and use a new split pin to slide it in and oen up both sides to stop it from falling out. Should be doable by hand, but use a plier to make it nice and tight.
Now do the same for the footpeg on the other side.
Final Thoughts
Upgrading your dirt bike can seem daunting, but installing new titanium foot pegs is actually a straightforward process. As summarized in this article, it simply involves removing the stock hardware, swapping in the new pegs and properly securing everything with split pins. While it does require some mechanical competency and the right tools, it is very achievable.
Make sure to check out the video for more details. Otherwise see you in the next one!
FAQs
Author information
My name is Charlie Frost, and I'm no stranger to the adrenaline-fueled world of extreme enduros. Starting my journey at 19, I seamlessly blended trials and enduro racing, honing my skills through youth events and extreme races like the Tough One and Erzberg. When I'm not tearing through rugged terrain, you can often find me in front of the 24MX camera, sharing my passion and insights with fellow riders, as we delve into the exhilarating world of off-road racing.