18 Aug 2026 • 5m read
How to change motorcycle tyres

Knowing how to change motorcycle tyres yourself can save you money and give you more control over when the job gets done. Instead of booking a professional tyre fitter every time your tyres wear out, doing it at home or in your workshop can make a real difference, especially if you ride often or cover a lot of miles.
Many riders switch between different sets of motorcycle tyres depending on how they ride. One set might suit daily commuting, while another works better for long motorway journeys, off-road riding or track days. If you change tyres regularly, learning how to change motorcycle tyres quickly becomes a practical skill, not just a way to cut costs.
You can find more tips on tyre care in the XLMoto article The Ultimate Guide to Motorcycle Tyres. Below, we explain how to change motorcycle tyres step by step and what you need to do it safely.
Essential Tools and Equipment
Knowing how to change motorcycle tyres is one thing, but doing it safely and efficiently depends on having the right tools to hand. The basics include tools for removing the wheel, breaking the bead, and levering the tyre on and off the rim without damaging it. You will also need a few fitting essentials to make installing the new motorcycle tyres smoother and to help avoid pinching the tube or snagging the bead.
Lastly, you will need a way to inflate the tyre and check pressure, plus something to confirm the bead has seated properly once fitted. Taking the time to gather everything before you start helps the job run more smoothly and reduces frustration, particularly if you are new to changing motorcycle tyres. Having the right tools ready can be the difference between an easy job and one that becomes unnecessarily difficult.
Tyre levers and bead breaker
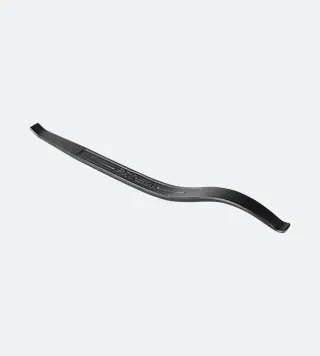
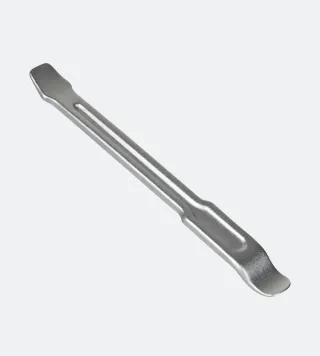
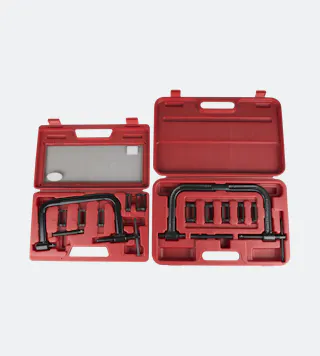
Tyre levers are essential for lifting the tyre bead over the rim during removal. You will need a set in order to take off old motorcycle tyres and to work new tyres over the rim while they are deflated. A bead breaker is also important. You'll need this to separate the tyre bead from the rim before you start levering. It reduces strain on the wheel and makes the whole process far easier and safer than forcing the tyre off by hand. Make sure you use tyre levers that are the correct size for your wheel. Levers that are too small or poorly shaped are more likely to slip or apply uneven pressure, increasing the risk of damage to the rim or unnecessary effort during removal and refitting.

Rim protectors
Rim protectors are designed to sit between the tyre lever and the wheel, helping to protect the rim from scratches, scuffs or small dents while you work. They are especially useful if your bike has alloy wheels, as alloy rims tend to mark more easily than steel during the tyre removal and fitting process. When changing motorcycle tyres, rim protectors need to be repositioned as you move around the circumference of the wheel. Doing so ensures the rim remains protected at each stage of removal and refitting, rather than just in one area.

Valve tools and air pump
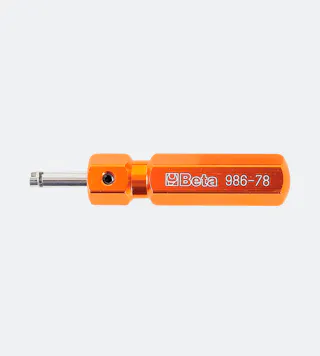
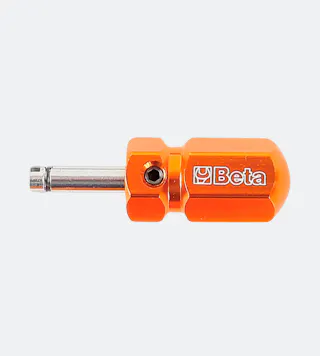
A valve core tool allows you to remove and reinstall the valve core, which is necessary for fast deflation and correct inflation when changing tyres. For riders learning how to change motorcycle tyres, this is a simple but essential tool to have in a home garage or paddock setup. You will also need an air pump or compressor, which is required to seat the tyre bead correctly on the rim. Once the bead is seated, the same pump is used to inflate the tyre to the correct pressure after fitting.

Wheel balancing stand (optional)
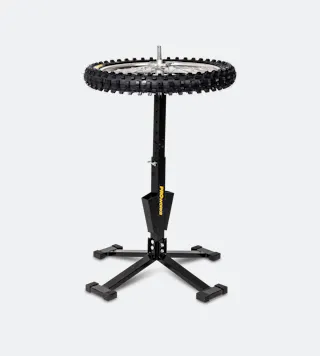
A static wheel balancing stand is not essential equipment, but owning one can be very helpful. When used correctly, it allows you to identify heavy spots on the wheel after a new tyre has been fitted and inflated. Small balance weights can then be added to restore proper balance, which is important for reducing vibration at higher speeds. Although there are informal at-home balancing methods, a dedicated balancing stand usually provides more accurate and reliable results than trying to balance a wheel without one.

Mistakes to Avoid When Changing Tyres
Before you start changing a motorcycle tyre, it is worth checking whether it actually needs replacing. Tyres can sometimes lose pressure simply through normal use, rather than because they are worn out or damaged. In some cases, reinflating the existing tyre may be all that is required. For that reason, it helps to know how to check motorcycle tyre pressure before you begin any tyre work.
Pinching the inner tube
Pinching the inner tube is a common mistake, especially when tyre levers are pushed too far under the bead or used at the wrong angle. When fitting tube-type tyres, make sure the tube is positioned evenly inside the tyre so it does not become trapped between the lever and the rim. Using gentle lever pressure and keeping the tube slightly inflated can greatly reduce the risk of pinching, which may otherwise cause an immediate puncture or sudden air loss after fitting.
Damaging the rim
Rim damage often happens when tyre levers slip off the bead or when too much force is applied. Using incorrectly sized levers can make this more likely, so always choose tools that suit your wheel. Damage is also far more common when changing motorcycle tyres without rim protectors, particularly on alloy wheels. While light scratches are usually cosmetic, dents or sharp edges can interfere with proper bead seating and affect performance. Keeping the bead well lubricated and working gradually around the rim helps reduce the risk.
Incorrect tyre direction
Many motorcycle tyres feature a directional arrow on the sidewall. If the tyre you’ve bought has one, which most modern tyres do, make sure this arrow lines up with the forward rotation of the wheel once it’s mounted on the bike. Fitting a tyre in the wrong direction affects how the tread is designed to work. This can be dangerous in wet conditions, as the tyre won’t clear water from the road surface effectively. Even in dry conditions, incorrect tyre direction can affect handling and braking performance. Always check the tyre’s orientation before fitting the first bead onto the rim. If the tyre ends up fitted the wrong way, it needs to be removed and refitted correctly.
Not checking air pressure and seal
Failing to confirm the correct pressure of any newly fitted motorcycle tyres can lead to poor handling and premature tyre tread wear. An unseated tyre bead will typically lead to air leakage. Depending on the rate of pressure loss, this could result in dangerous instability while riding. It is also important to make sure valve cores are tightened properly to prevent gradual air loss. Always recheck tyre pressure after the bead has settled and before riding the motorcycle.

How to Remove the Old Tyre
Learning how to change motorcycle tyres starts with removing the worn ones safely and correctly. Before you begin, check your bike’s service manual for any model-specific guidance and make sure the motorcycle is properly supported. Once the wheel is off the ground and secure, fully deflate the tyre by removing the valve core. This step makes it much easier for the tyre bead to release from the rim.
Next, use a bead breaker to separate the bead from the wheel rim. This needs to be done on both sides of the tyre before you try to lever it off. Applying a small amount of tyre lubricant around the bead can help reduce resistance and make the process smoother. Slide a tyre lever under the bead and work your way around the rim in short sections. As you go, add additional levers to stop the bead from slipping back into place.
After one side of the bead is free around the circumference of the tyre, lift it over the rim so it straddles the other loosely. You can often remove the rest by hand. Alternatively, use the levers with minimal force to get it completely off. If the old motorcycle tyres you are removing have inner tubes, remove them once the first bead is off. This will help you steer clear of any unnecessary stretching or damage to them.
How to Mount the New Tyre
If you are unsure which tyres are right for your bike, read our guide on how to choose motorcycle tyres before getting started. Once you have the correct tyre, the next step is fitting it properly. Begin by lightly lubricating both the tyre bead and the rim edge of the wheel. This helps the tyre slide into position without needing excessive force, reducing the risk of damage.
If your bike uses an inner tube, which is less common on modern motorcycles, insert it carefully after the first bead is in place. Make sure the tube sits evenly inside the tyre, with no twists or pinched sections. For both tube-type and tubeless tyres, push the first bead over the rim by hand as far as possible before using tyre levers for the final section. Doing this allows the tyre to sit loosely on the wheel and makes the next steps easier.
Next, fit the second bead using tyre levers. Work slowly and in small steps, keeping the opposite side of the bead pressed into the wheel rim’s well. Avoid forcing the levers, as this can damage both the tyre and the rim. Taking your time here helps the bead slip over the rim smoothly and evenly.
Once the tyre is fully seated, inflate it slowly. This gives the bead time to seat evenly on both sides of the rim. Watch closely as it inflates and stop if anything looks uneven. When the bead is seated correctly, you can then reinstall the valve core.
How to Check and Balance the Tyre
After inflating the tyre, spin the wheel by hand. This helps you spot any wobbles, bulges or uneven rotation, which could indicate the bead has not seated properly. Applying soapy water around the bead and valve area can also help identify slow air leaks. If you notice any issues, deflate the tyre and refit it before riding.
To balance the tyre, place the wheel on a balancing stand and allow it to rotate freely. If the wheel consistently settles with the same section at the bottom, this indicates a heavy spot. Apply small adhesive wheel weights to the opposite side of the wheel. Adjust the weight placement gradually until the wheel remains still in any position, confirming that it is properly balanced.

Changing Motorcycle Tyres FAQs
Can I change motorcycle tyres at home?
Yes, many motorcyclists change their own motorcycle tyres at home. You do need the right tools and to follow the correct procedure, though, as it can be unsafe if done incorrectly. If you already have some experience with basic motorcycle maintenance, this is a job you can work up to with a bit of practice. It’s also worth noting that some bikes are much harder to work on than others. Large adventure motorcycles are often among the most challenging, so if you’re new to working with motorcycle tyres, it’s best to start with a simpler bike.
Do I need to balance the tyre after installation?
Although not an essential step, it is always good practice to balance motorcycle tyres that have just been fitted. Unlike a car’s setup, where unbalanced tyres might only cause extra wear and tear or minor performance issues, a bike’s balance depends far more on how its wheels and tyres are set up. Even small weight differences can make the bike feel off kilter, and the problem tends to get worse as vibrations build through the chassis, especially when riding at higher speeds.
Riders who spend long hours in the saddle tend to notice this first, as vibrations gradually travel through the handlebars and into your hands over time. Short trips around town or occasional rides might not make the issue obvious straight away, but it can still affect overall comfort and how stable the bike feels. Balancing newly fitted motorcycle tyres helps avoid these problems, keeps the ride feeling smoother, and reduces unwanted vibrations that become more noticeable at higher speeds.
How do I know the tyre is seated correctly?
The correct seating of motorcycle tyres becomes apparent when they inflate smoothly. This means without bulges, wobbles or visible gaps between the bead and rim. Many tyres come with a moulded indicator line, situated near the bead. This should sit evenly around the entire rim once the tyre is inflated, indicating the proper seating of your motorcycle tyres.
For home installation, it is a good idea to listen to the tyre's bead when inflating it. If you hear a clear 'pop' sound, then this usually means that the process of pumping the tyre up has pushed the bead into the right place, thereby seating the tyre correctly. Check carefully if you didn't hear this sound and be prepared to start over, if not.
What tyre pressure should I use after installation?
The bike’s owner’s manual will list the recommended tyre pressure range, sometimes with small variations depending on how the bike is set up, such as riding with a pillion or heavy saddlebags. Stick to these figures wherever possible. You’ll also find a code on the sidewall of all motorcycle tyres that shows the maximum inflation pressure, but this should not be treated as a target figure.
Your tyres should always be inflated according to the pressures stated in the owner’s manual, as these are set by the bike manufacturer. Keep in mind that many motorcycles require different pressures for the front and rear tyres. After inflating newly fitted tyres, a small drop in pressure can occur as the bead settles fully onto the rim. For this reason, it’s important to recheck the pressure shortly after fitting to make sure the correct level of inflation has been maintained.
How often should motorcycle tyres be replaced?
Once tread depth reaches the legal minimum of 1 mm in the UK, tyres must be replaced. In reality, most riders change their tyres before they get this low for safety reasons. Pushing tread right to the limit often means motorcycle tyres are already past their best in other ways, especially as the rubber ages. Visible damage, such as flat spots or cracks, is a clear sign that replacement should happen straight away.
As a general guide, motorcycle tyres usually last between 3,000 and 10,000 miles, depending on the rubber compound and riding style. Rough road surfaces, higher speeds, frequent hard cornering and heavy braking will all shorten the lifespan of your motorcycle tyres.


